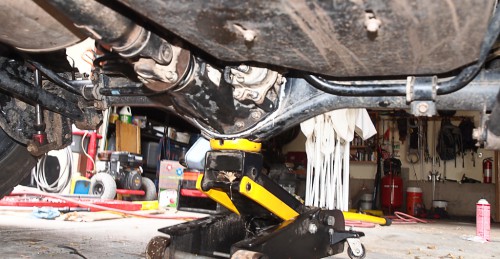
My Toyota FJ Cruiser has been leaving little spots on the ground everywhere I have been parking. In the last few weeks they have gone from spots to little puddles and I have been having to top off the gear oil. This is a problem that I finally had to address.
With the Toyota FJ Cruiser rear axle design the differential and its carrier (also called a 3rd member) is a separate unit that bolts into the axle housing to provide the complete system. (See diagram)

Toyota FJ Cruiser Rear Axle
On many other applications the differential is setup and installed directly in the axle housing. (See diagram)

Typical Axle from a Jeep
Setup of a differential is a precise art that requires the backlash between the ring and pinion gears to be set up precisely when assembled. This is done using precise gauges and shims. For the system used in the FJ the ring and pinion are setup in the separate carrier. For the one piece axle design the ring and pinion must be setup in the full axle housing. The reason that I am mentioning this is the ease of field repairs for the FJ and why mine is leaving puddles behind.
The rear differential is the low spot on the under the FJ and will find a rock now and then. Picking the right line while driving can minimize dragging the rear differential over something. However, sometimes it is unavoidable and the rear diff gets knocked on a rock. The housing itself is very strong and should hold up well. Leaks, on the otherhand, are inevitable for the unprotected rear diff.
Why the digression about the two types of differentials? The Toyota design lends itself well to field repairs. Should a differential blow up a fully built 3rd member can be ordered and taken into the field and easily replaced. With the integrated carrier design the hole axle needs to go to the shop for the gear setup.
With a possible field replacement in mind I figured pulling and reinstalling my FJ’s 3rd member would be a very good exercise. Quite the ordeal to just fix a leak but I needed to stop leaving little puddles where ever I parked.
I won’t go through the process here which is well documented on a number of Internet sites. Lets just say that it took me about 6 hours of mostly laying on my back under the FJ. Getting the differential prepped for removal took the most time. I also recommend removing the rear lock sensor before pulling the carrier. I didn’t do this and managed to break the plug on the sensor when I set the differential on the ground. This added $90.00 to what was going to be an inexpensive repair.

My work area, boy I wish I had a lift

Axle housing ready to be cleaned

Removed 3rd member

Axle pull part way

Completed project
I did this repair solo and with a bad shoulder so I had to rig the 3rd member to a floor jack so I could get it positioned for the reinstall. An assistant will make this step MUCH easier. For the install, a good local off-road shop recommended that I use Permatex Ultra Grey for the gasket. A razer blade and brake cleaner helped clean the mating surfaces.
I am very please that I completed this repair. It is one more thing that I now have in my bag for trail repairs. Even though a 3rd member replacement on the trail will take days, (you have to wait for the part) in many cases it will cost much less that having the vehicle recovered to the trailhead.
If you dare to venture down this path here is a link to a good process flow.

1 comment for “FJ Incontinence”